You don't need a 2,000-square-foot workshop to build professional-quality custom cabinets.
With a portable workbench system, you can transform any 10x12 space garage, driveway, or even a client's site, into a fully functional cabinet-making operation.
This method has enabled contractors to complete $15,000 kitchen renovations working entirely from the back of an F-150, and hobbyists to build museum-quality pieces in apartment balconies.
The key lies in choosing the right portable workbench that provides the stability of a shop fixture with the mobility of a toolbox.
Essential Features Your Portable Workbench Must Have
Not all portable workbenches can handle cabinet construction. Based on analysis of successful portable cabinet shops, these features prove non-negotiable:
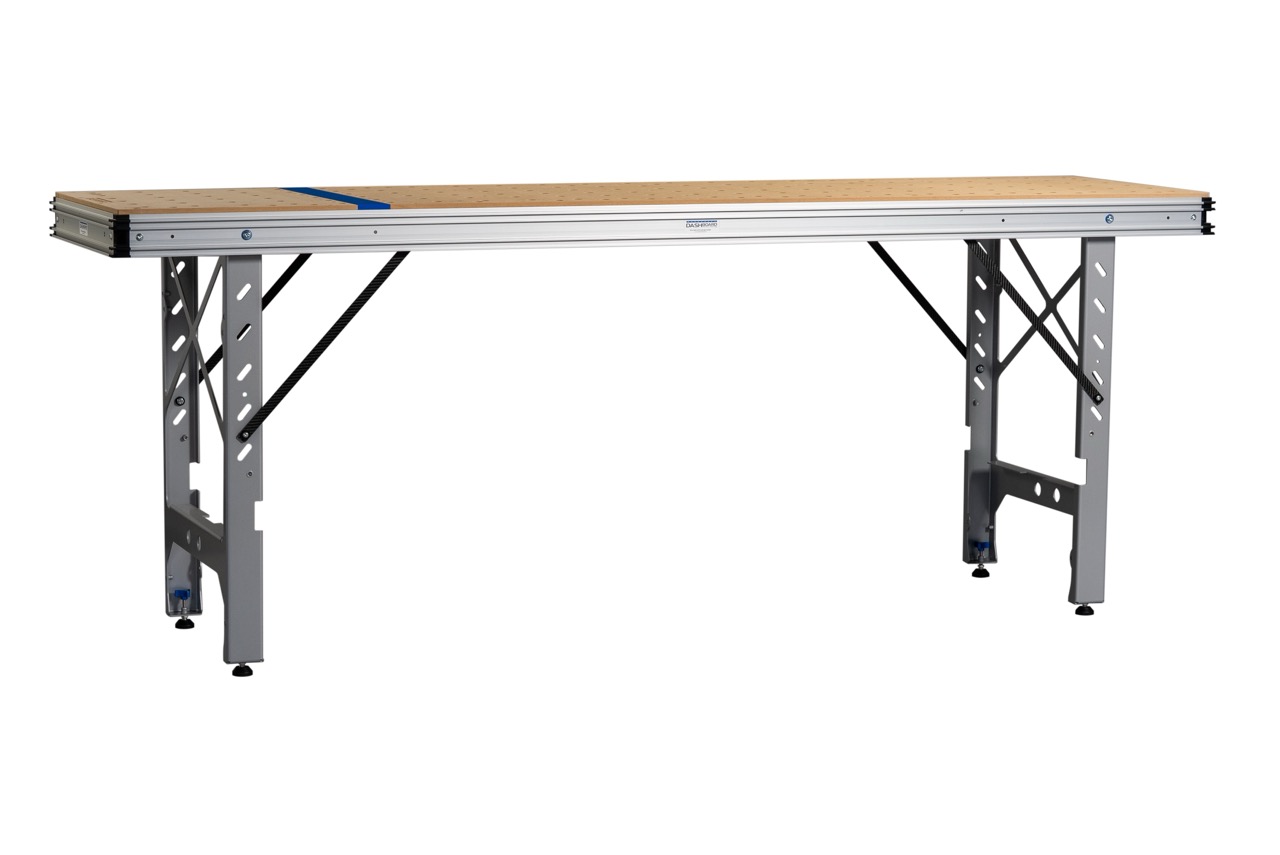
Dog Hole Grid System: A grid of 20mm dog holes on 96mm centers provides practically infinite clamping and accessory positioning options.
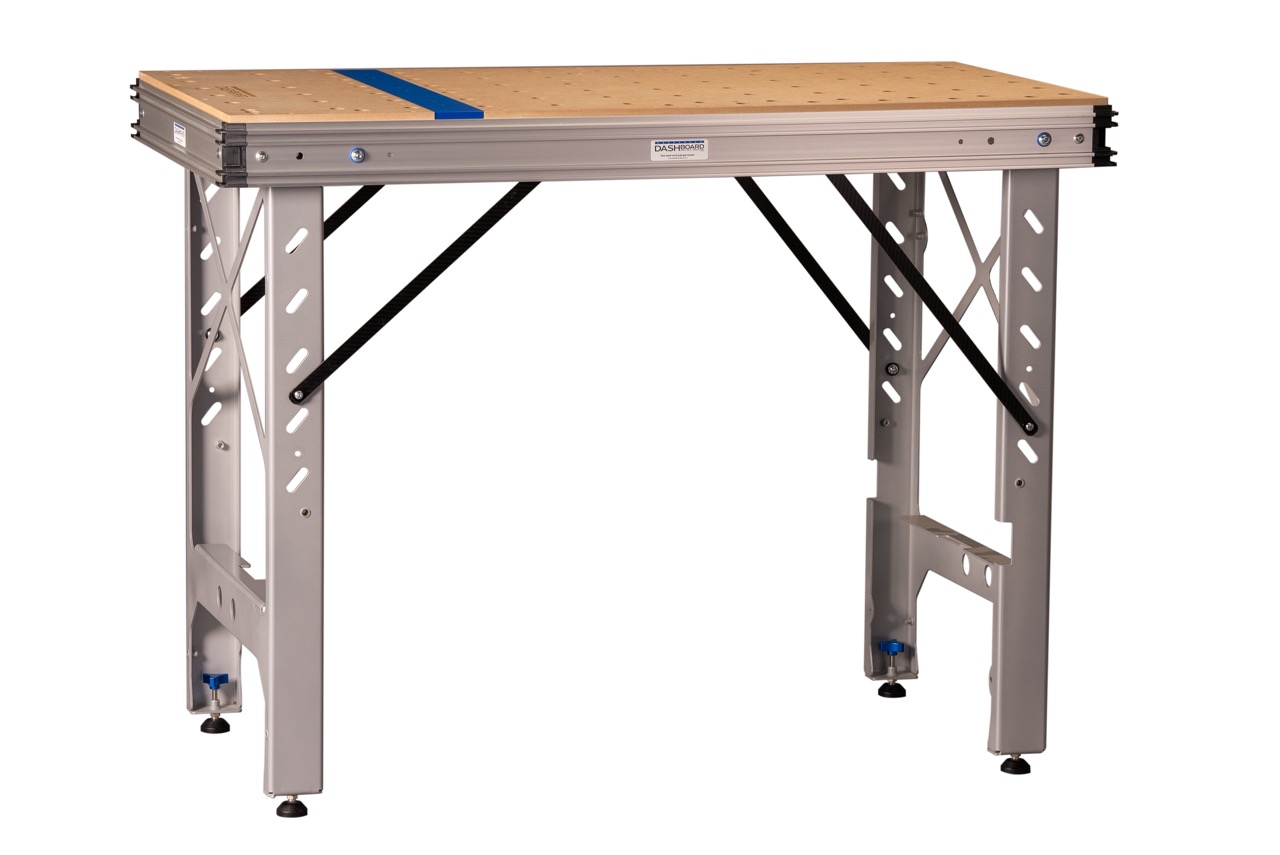
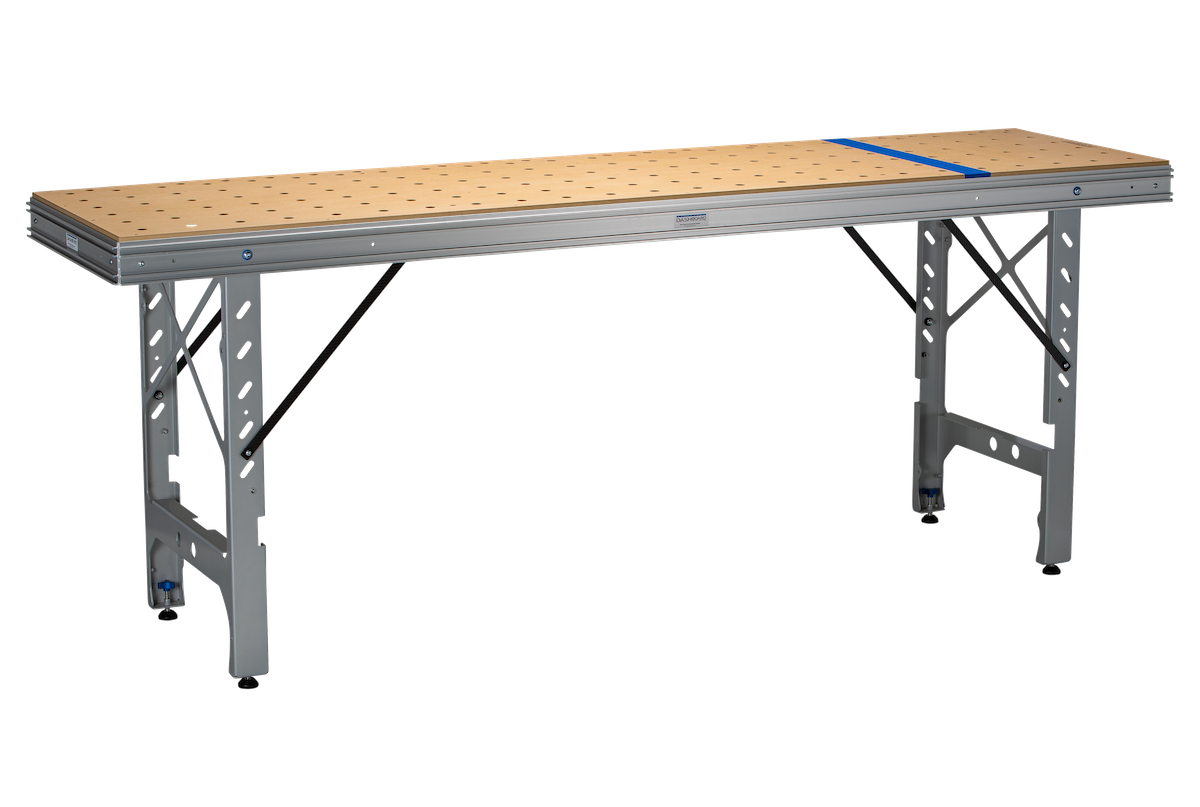
Minimum Surface Area: Cabinet sides typically measure 34.5" x 23.25". Your work surface needs at least 32" x 48" to support pieces during assembly, with overhang capacity for larger components. The full-size Dash-Board workbench offers 92.56" x 24.41" of workspace enough to support a full sheet crosscut while the ShortCut model provides a more compact 46" option for tighter spaces.
Weight Capacity: Base cabinets with 3/4" plywood construction weigh 60-80 pounds before installation. Your bench must support 300+ pounds without flexing, especially during glue-ups where any movement compromises joint integrity. The patented leg design on professional-grade benches distributes weight evenly while maintaining rigidity.
Setting Up Your Mobile Cabinet Shop

The transformation from empty space to functional cabinet shop takes 15 minutes with proper preparation. Here's the proven setup sequence used by professionals:
Site Selection: Choose a level surface with 10' x 12' minimum clear space. This allows full sheet goods manipulation and assembly of base cabinets up to 36" wide. For garage setups, position near the door for ventilation during finishing.
Workbench Positioning: Place your primary bench perpendicular to natural light sources. This orientation prevents shadows in the cutting line and provides even illumination for joint inspection. If using multiple benches, the Dash-Board system allows end-to-end connection without compromising the clamp tracks—a unique feature that effectively doubles your work surface when needed.
Tool Organization: The Track Star accessory system revolutionizes tool placement by providing adjustable support anywhere along your bench. Slide Track Stars anywhere they’re needed. This eliminates the dead space common with fixed tool stations and expands the bench’s versatility.
Material Staging: Position sheet goods vertically against a wall within 6 feet of your cutting station. Use furniture blankets to protect finished surfaces. Stack components by assembly order: sides, tops/bottoms, backs, shelves, faces.
The Five-Phase Cabinet Building Process
Professional cabinet makers using portable workbenches follow this optimized sequence:
Phase 1: Design and Material Planning (2-3 hours)
Start with precise measurements of the installation space. Transfer dimensions to grid paper or design software, adding 1/2" clearance on all sides for installation. Calculate material needs using the 80% rule, expect 80% yield from each sheet after accounting for defects and cutting waste.
Create cutting diagrams that maximize material usage. A standard kitchen typically requires 12-15 sheets of 3/4" plywood for boxes and 3-4 sheets of 1/4" for backs. Order 10% extra for mistakes and modifications.
Phase 2: Precision Cutting (4-6 hours per kitchen)
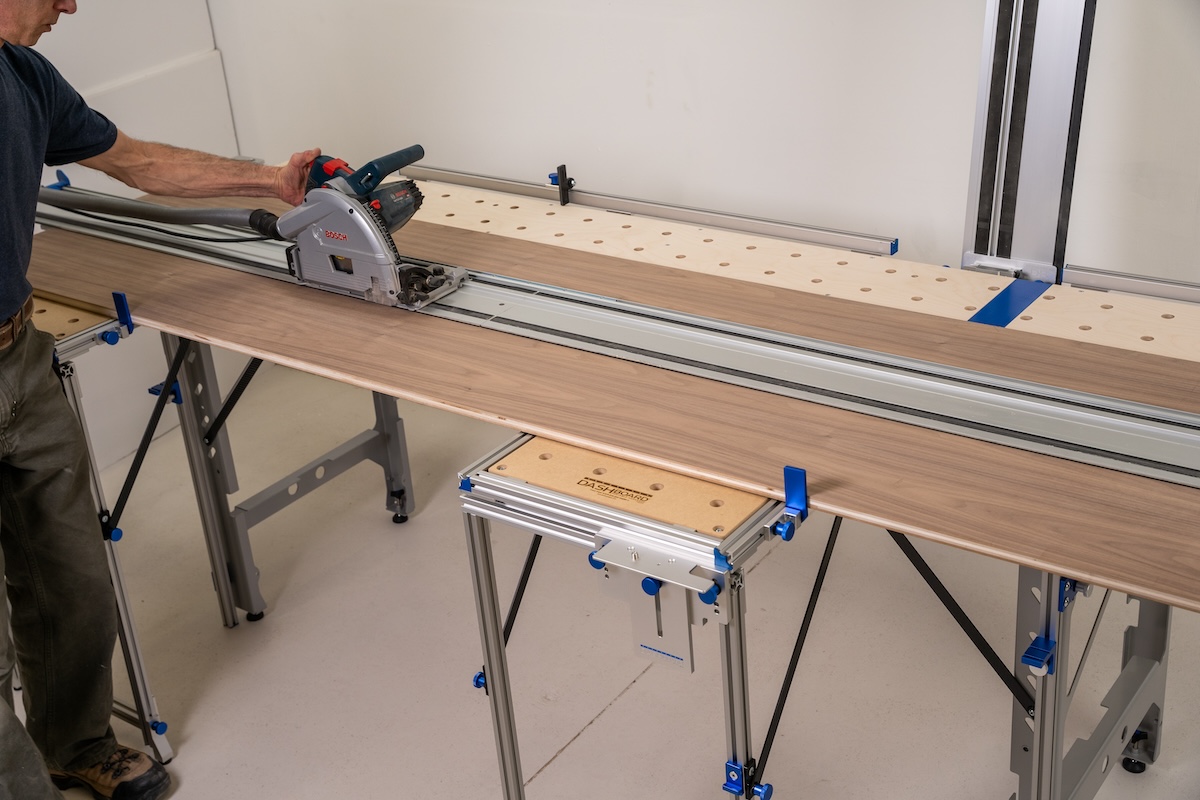
Mount a track saw guide system to your workbench for repeatable cuts.
The Dash-Board Guide Rail Bracket Set locks at exactly 90 degrees to the fence with drop-down capability when not in use, saving precious workspace. Users report achieving consistent 0.001" tolerance after thousands of cuts, exceeding the accuracy of many cabinet shop panel saws.
Cut all similar pieces in sequence. For a five-cabinet kitchen, cut all sides first (maintaining consistent 23.25" depth), then all tops/bottoms, then shelves. This batching reduces measurement errors and ensures uniform dimensions.
The Rip Gauge accessory eliminates measuring for repeat cuts by incorporating your exact blade kerf. Set it once for 23.25" cabinet depth, and every subsequent cut matches perfectly. Cabinet makers report 50% time savings on repetitive cuts using this system versus traditional measuring.
Phase 3: Joint Preparation (2-3 hours)
Modern cabinet construction relies on pocket screws, dowels, or confirmat screws and other hardware rather than traditional joinery. Your portable workbench's clamping system proves crucial here. Position work pieces face-down on the bench, using bench dogs to prevent movement during drilling.
For pocket screw joints, maintain consistent 1.5" spacing from edges and 6-8" centers along the joint. The workbench's grid system helps maintain these intervals without constant measuring.
Phase 4: Assembly Strategy (6-8 hours)
Cabinet assembly requires a specific sequence to maintain square and prevent racking. Start with one side lying flat on the workbench. The F2 Surface Mount Fence serves as a perfect reference edge, adjustable to any angle but locked solid at 90 degrees for cabinet work.
The Parallel Guide system allows you to position stops at exact measurements on both sides of your assembly, ensuring every cabinet comes out identical. This proves especially valuable when building multiple boxes—set your guides once and build all day without re-measuring.
Use cauls spanning between bench dogs to apply even pressure during glue-ups. This technique prevents the banana-effect common with edge-glued panels. Allow 30 minutes cure time before moving assemblies.
Phase 5: Finishing and Hardware (4-5 hours)
Transform your portable workbench into a finishing station by adding sacrificial cardboard to the top. For spray finishing, the bench's mobility becomes its greatest asset—simply carry it outside for perfect ventilation. The sturdy construction handles the weight of fully loaded cabinets without sagging.
Install doors using the workbench as a reference plane. The integrated T-tracks accept the Reversible Flip Stop, creating a perfect registration point for multiple doors. This ensures consistent reveal gaps of exactly 1/8" between doors without constant measuring.
Advanced Techniques for Complex Projects
Building Island Cabinets
Island cabinets present unique challenges without a shop. They require access from all sides during construction and can measure 48" x 36" or larger. The Dash-Board system's ability to connect multiple benches side-by-side creates expansive work surfaces while maintaining the structural integrity needed for heavy assemblies.
Handling Full Sheet Goods
Breaking down 4x8 sheets in confined spaces requires technique. The Outrigger Bundle transforms your bench into a panel processing station, providing support for full sheets during crosscuts. The integrated Rail Hangers keep your track saw guide secure between cuts, eliminating the juggling act common with basic sawhorses.
Replicate parts with ease
Use the Rip gauge to make copies of things you already cut., It can be set to match the dimensions of existing parts and translate those to Flip Stops, Rip Stops, and Parallel Guides.
Common Pitfalls and Solutions
Problem: Cabinets come out of square during assembly. Solution: Check your workbench level before every session. Professional benches include leg levelers that compensate for uneven floors, a common issue in garages and job sites. A 1/8" deviation across 48" translates to 1/4" gap at cabinet installation.
Problem: Insufficient clamping pressure for large glue-ups. Solution: The dual clamp tracks on quality portable benches provide vertical holding power superior to traditional bench vises. Position clamps exactly where needed using the continuous track system.
Problem: Dust control in living spaces. Solution: Create a dust containment system using 6-mil plastic sheeting and spring clamps. The bench's numerous attachment points simplify hanging barriers without permanent mounting.
Scaling Up: From Hobbyist to Professional
Many woodworkers discover that portable cabinet making can become a profitable business. The low overhead and mobility open opportunities unavailable to shop-based operations:
- On-site custom work: Build cabinets in clients' garages, eliminating delivery damage
- Renovation specialists: Work in occupied homes without shop noise/dust
- Small space solutions: Serve urban clients where shops can't deliver
- Insurance savings: No commercial space means residential policy coverage
Essential Accessories for Cabinet Making
For Precision Cutting
The Guide Rail Bracket Set proves indispensable for cabinet work, maintaining perfect square over thousands of cuts. Combined with the Rip Gauge for repeat measurements, you'll achieve cabinet shop accuracy from any location.
For Assembly Operations
Track Stars provide infinitely adjustable support for door mounting, shelf positioning, and material support. The F2 Surface Mount Fence creates a reliable reference edge that adjusts from 90-degree cabinet assembly to angled cuts for molding.
For Material Handling
The Outrigger Bundle extends your work surface for processing full sheets safely. Its folding design means it stores compactly for transport but provides rock-solid support when deployed.
Your Next Steps
Success with portable cabinet making depends on three factors: proper equipment, refined technique, and practice. Start with a simple project a single base cabinet or bathroom vanity. This builds confidence while revealing any gaps in your setup and technique.
Consider starting with the Pro Accessories Bundle if you're serious about cabinet making but want to test the waters before committing to the full system. This provides the essential Guide Rail Brackets, Surface Mount Fences, and support accessories that transform any sturdy table into a precision cabinet-making station.
Document your workflow, noting pain points and inefficiencies. The portable method requires more organization than shop work, but delivers superior flexibility. Most converts report they'd never return to traditional shop-based building, citing reduced overhead, eliminated commute time, and ability to work anywhere.
The gap between professional and hobbyist cabinet making has never been narrower. With a quality portable workbench system designed for the demands of cabinet construction not just light hobby work, you can build cabinets that rival high-end custom shops from your garage, apartment balcony, or pickup truck bed.
The only question is: what will you build first?
Frequently Asked Questions
Can I really build professional-quality cabinets without a dedicated workshop?
Absolutely. Modern portable workbenches like the Dash-Board system provide the same precision and stability as shop fixtures. Many professionals now work exclusively from portable setups, completing $15,000+ kitchen renovations from garages or job sites. The key is using a workbench designed for heavy-duty work with proper clamping systems and adequate weight capacity.
What's the minimum space needed to build full-size kitchen cabinets?
You'll need approximately 10' x 12' of clear floor space to comfortably handle standard cabinet construction. This allows room to maneuver full sheets of plywood and assemble base cabinets up to 36" wide. The space can be a garage, basement, driveway, or even a client's site—the portable workbench method adapts to any level surface.
How much does a complete portable cabinet-making setup cost?
A professional-grade setup runs $3,000-5,000 total. This includes a quality portable workbench system with accessories ($1,700-2,900), a track saw ($400-1000), and basic power tools. Compare this to $50,000-100,000 for a traditional cabinet shop. The investment pays for itself after 2-3 kitchen projects.
What's the biggest challenge when building cabinets without a shop?
Dust control and material handling are the main challenges. Without dedicated dust collection, you'll need to use shop vacuums with HEPA filters and potentially set up plastic barriers. For material handling, accessories like the Outrigger Bundle provide crucial support for full sheet goods, replacing the infeed/outfeed tables found in traditional shops.
How long does it take to set up and break down a portable cabinet shop?
With an organized system, setup takes 15-20 minutes and breakdown takes about the same. Modern workbenches like the Dash-Board use tool-free assembly with leg levelers and quick-release components. The key is developing a consistent routine and keeping tools organized in the bench's built-in storage.