Your track saw rail hinge either simplifies crosscuts or becomes another tool you work around. The difference comes down to proper installation and calibration.
After analyzing 54 verified customer reviews and documenting actual setup procedures, here's what you need to know to install guide rail brackets correctly the first time.
What Guide Rail Brackets Actually Do
A guide rail bracket (often called a rail hinge) locks your guide rail perpendicular to a fence or parallel to your workbench edge. This eliminates the repetitive measuring and squaring process that consumes 3-5 minutes per crosscut. Instead, you flip the bracket down, set your rail, and cut with confidence that you're maintaining 90-degree accuracy.
The practical impact shows in batch work. Cutting 20 cabinet panels without brackets means 20 separate squaring operations and potential cumulative error. With properly installed brackets, you square once and repeat indefinitely. Professional cabinetmaker Douglas Pelchat notes: "No more constant checking to confirm that the rail is square to my fence. Being confident in my setup speeds production, reduces waste and makes the whole process flow smoothly."
Compatibility: What Works With What
Modern guide rail brackets fall into two categories: universal systems and manufacturer-specific designs. Understanding compatibility before purchase prevents the frustration of discovering your $300+ bracket won't mount to your existing setup.
Universal Bracket Systems
The Dash-Board Guide Rail Bracket Set ($359) represents the universal approach, accepting all major rail brands through its adjustable SpiRail Dog system. This works with:
- Festool guide rails
- Makita guide rails
- DeWalt track saw rails
- Bosch/Mafell guide rails
- Kreg adaptive cutting system rails
- Any third-party rail with standard profile
The universal design uses integrated SpiRail Dogs that slide into your rail's bottom slot. You're not limited to a specific manufacturer, which matters if you own multiple track saw brands or plan to upgrade in the future.
Manufacturer-Specific Systems
Festool's original MFT bracket system works exclusively with their MFT table. The brackets can accept Festool rails as well as compatible rails from Makita and other brands that share the same basic design. The advantage is tight integration if you're already invested in the Festool ecosystem.
The limitation becomes apparent when you want to mount brackets to a non-MFT table or need a system that works across different workbench platforms.
Customer feedback consistently notes that universal systems like Dash-Board's brackets exceed proprietary designs in build quality. Cliff Fent's comparison: "This bracket is far superior to the Festool version supplied with their brackets." Dennis May echoes this after switching: "I had the Festool bracket and this far exceeds the quality."
Pre-Installation Requirements: What You Actually Need
Before opening your bracket package, verify you have these elements ready:
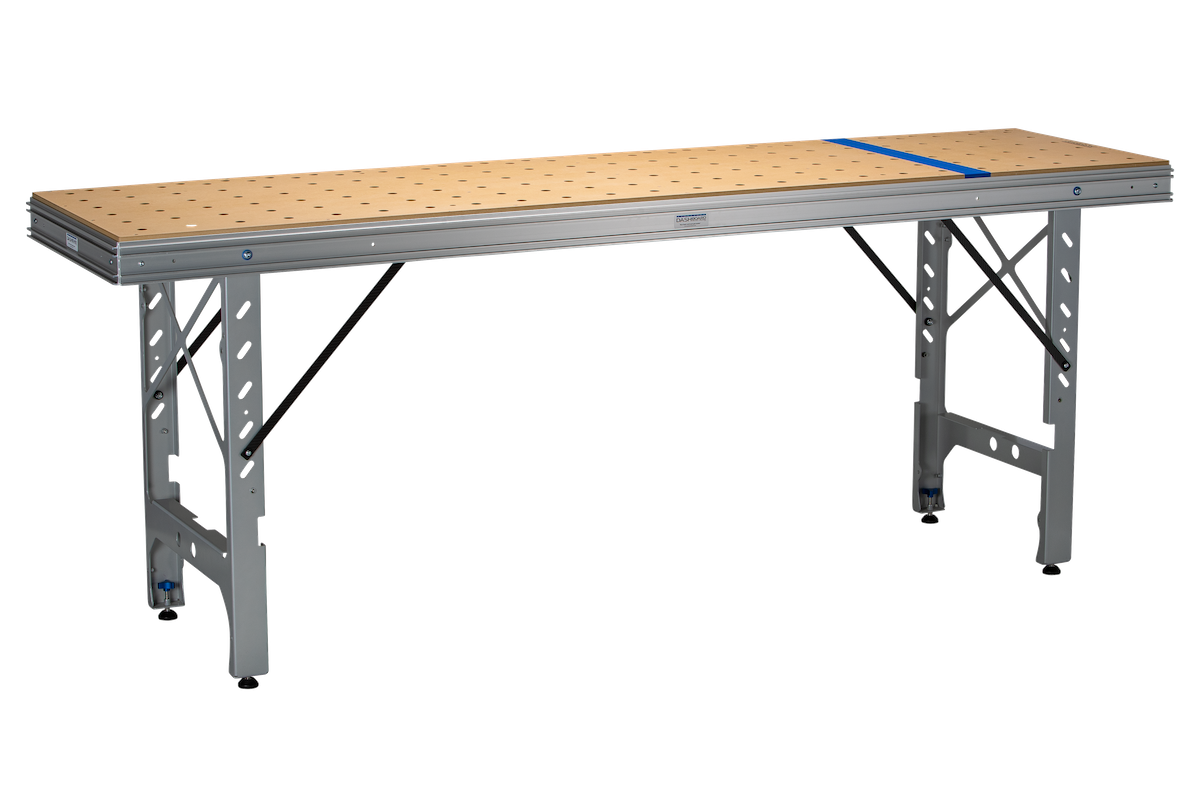
A mounting surface with 20mm dog holes: Your workbench needs either an MFT-style grid of 20mm holes and T-track mounting capability (check specific requirements by brand). The hole spacing doesn't need to be precise (you'll work within whatever grid you have), but the holes must be 20mm diameter to accept standard squaring or mounting hardware.
Square fence or reference edge: You need one reliable 90-degree reference. This can be a factory-made fence, a verified straight edge, or even a trusted carpenter's square if you're setting up temporarily. Your bracket accuracy depends on this reference being truly square.
Track saw and guide rail: Obvious, but worth stating. The brackets serve the rail, and the rail serves the saw. Maximum cutting height with most bracket systems is 2.9 inches (74mm), which accommodates standard track saw depths.
Adequate clearance below table surface: Most brackets pivot down below the table when not in use. Verify you have 3-4 inches of clearance if using drawers or lower shelves directly beneath your mounting location.
Basic hand tools: Despite "tool-free" claims, installation requires something to verify square (a good combination square or precision triangle). The adjustment process itself needs no tools, but initial setup does.
Installation Step-by-Step: The Sequence That Prevents Problems
Guide rail bracket installation fails when people rush the setup or skip the squaring verification. This sequence eliminates the common mistakes:
Step 1: Identify Your Mounting Location
Position brackets where your most common crosscut length will be centered. For cabinet work, this typically means 24-30 inches from your fence to the bracket center. For full-sheet plywood, position brackets 48 inches from your fence to enable clean half-sheet crosscuts.
The critical dimension isn't the exact distance but ensuring both brackets (if using a pair) sit at the same distance from your fence. Measure from your fence to each mounting location and verify the measurements match within 1/16 inch. Any discrepancy here compounds into angular error.
Step 2: Mount the Brackets Without Rails
Insert the T-bar mounting hardware into your table's dog holes. The Dash-Board system uses knurled knobs that hand-tighten without tools. Position the bracket roughly perpendicular to your fence but don't obsess over precision yet.
Tighten the knobs finger-tight, not wrench-tight. You want firm mounting but will likely adjust position in the next step. Over-tightening makes adjustment difficult and can stress the table surface.
Step 3: Square the Brackets to Your Fence
Place your combination square or precision triangle against the fence with the blade extending across the bracket. The bracket face should contact the square blade completely with no gaps at top or bottom. Even a 1/32-inch gap indicates the bracket isn't perpendicular.
If you see gaps, loosen the knobs slightly and rotate the bracket until it contacts the square blade fully. This step determines your crosscut accuracy, so invest time here. Check at both the top and bottom of the bracket face. Variations suggest your square isn't reliable or your fence has issues.
Professional setups often use a 12-inch combination square for this step because the longer blade reveals angular errors that shorter tools miss. A 6-inch square might look perpendicular while actual error exists.
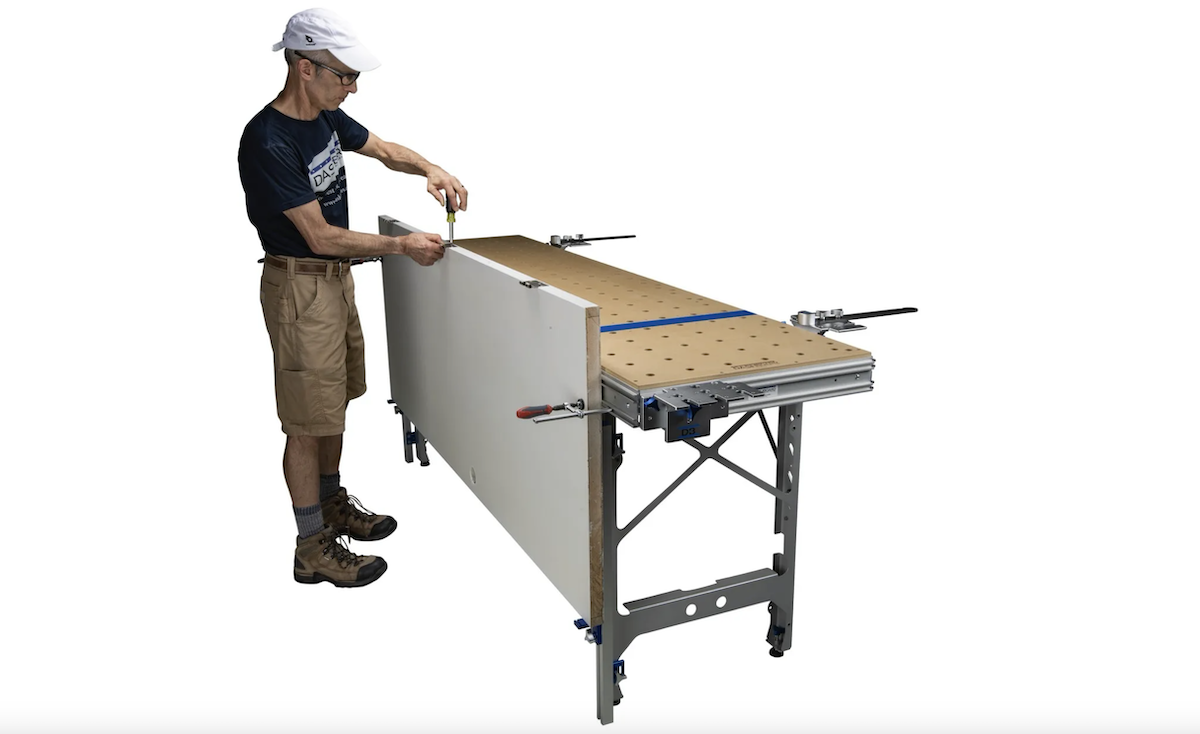
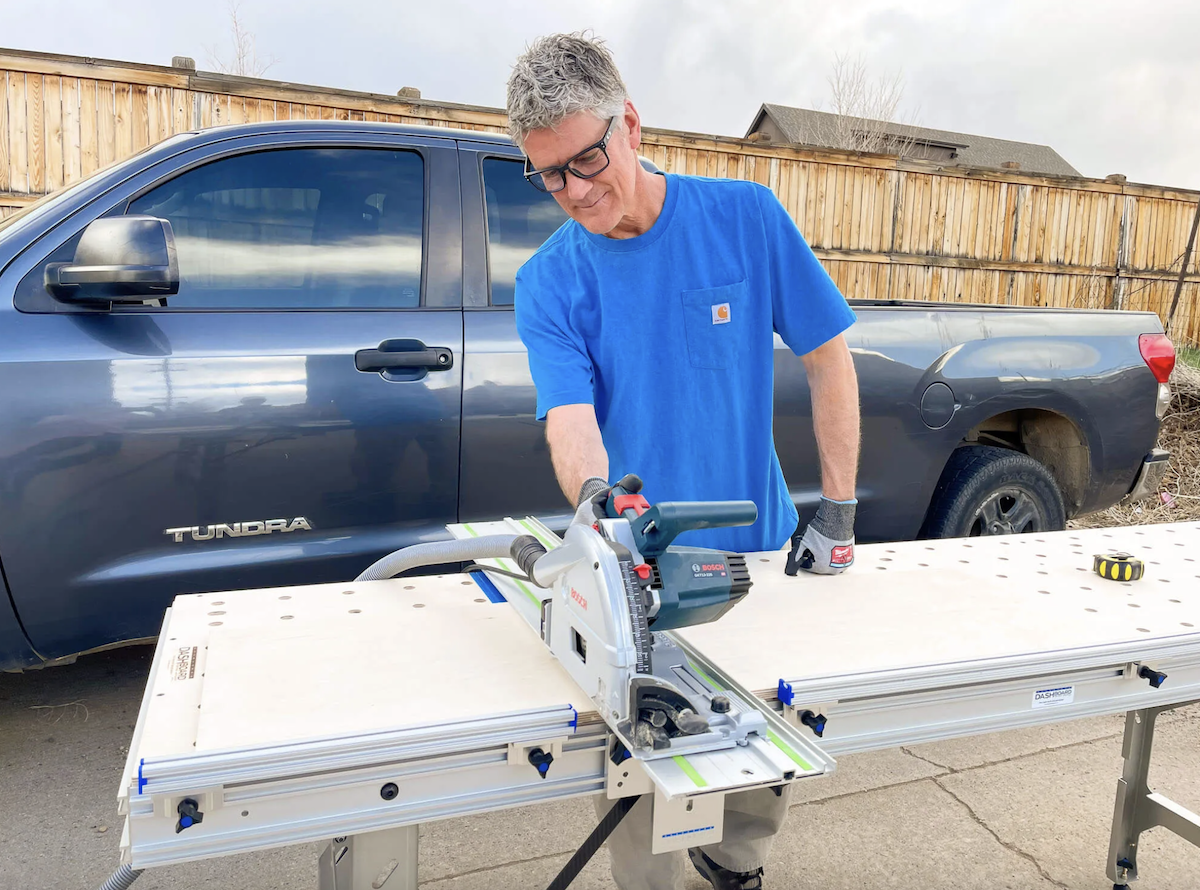
Step 4: Install Your Guide Rail
With brackets squared, install your guide rail. The Dash-Board SpiRail Dogs integrate into the bracket, creating a pivot point that allows the rail to flip up when not in use. The dogs slide into your rail's anti-slip channel (the rubber strip groove).
Position the rail so it sits flat against both brackets when lowered into cutting position. The rail should move smoothly through its arc without binding. If you feel resistance, check that the SpiRail Dogs are fully seated in the rail channel and that mounting height is consistent between both brackets.
Step 5: Verify Cutting Height
Lower the rail to cutting position and place a piece of your typical material thickness beneath it. The rail should sit 1-2mm above the material surface, allowing your saw's anti-tip feature to engage properly. Maximum material height is 2.9 inches (74mm) for most bracket systems, though this varies by design.
If the rail sits too high, your saw may tip during the cut. Too low and the rail digs into the material. The 1-2mm clearance is critical for consistent, safe cutting.
Step 6: Test Cut and Verify Square
Make a test crosscut on scrap material. Measure the cut with your square from both edges. A 24-inch-wide board should measure exactly 90 degrees on both sides. Any variance indicates bracket misalignment.
If the cut isn't square, return to Step 3. Don't assume small errors will "average out" or that you can compensate by changing saw pressure. Brackets either cut square or they don't, and calibration is the only fix.
Common Installation Mistakes That Cause Problems
Installing Brackets Before Verifying Table Flatness
A bowed or twisted table top causes brackets to mount at different angles even if carefully squared. Before bracket installation, check your table surface with a quality straightedge. You need flatness within 1/32 inch across the mounting span.
If your table isn't flat, shimming the low bracket brings it coplanar with the higher one. Thin metal shims (available at hardware stores in various thicknesses) work better than wood or plastic because they don't compress over time.
Over-tightening Mounting Hardware
Hand-tight is tight enough for bracket knobs. Over-tightening can crack the table surface, distort the T-bar mounts, or make later adjustments difficult. If your brackets move during use with hand-tight mounting, the problem is table design (holes too large or worn) rather than insufficient tightening.
Assuming "Close Enough" Alignment Is Acceptable
A bracket that's 1 degree off perpendicular produces 1/4-inch error over a 14-inch crosscut. This error accumulates in projects requiring multiple cuts. Cabinet face frames, for example, become difficult to assemble when cuts aren't precisely 90 degrees.
Samuel Hall's review emphasizes this: "Honestly exceeded my expectations. Very pleased with the quality and performance. Top tier." This reflects brackets that actually maintain the precision needed for professional work.
Skipping the Test Cut Verification
Installation isn't complete until you've verified square with an actual cut. Visual alignment and square checks predict accuracy but don't confirm it. Material thickness, saw blade run-out, and cutting technique all influence final results.
Professional shops make multiple test cuts at different positions along the rail before approving a bracket setup. This reveals any issues with rail straightness or bracket consistency.
Calibration and Fine-Tuning: Achieving Consistent Accuracy
Even properly installed brackets require periodic verification. Material changes, temperature variations, and normal wear affect accuracy over time.
The 5-Cut Test Method
Cut five pieces at different positions along your rail's length. Measure each cut for square. All five should measure identically within 1/64 inch. Variance indicates rail deflection, bracket movement, or saw issues rather than calibration error.
Andrew T., a Dashboard customer, reports: "I cannot believe the accuracy. 5 cut method. 17.25 inch final cut. Absolute zero deviation over that length." This level of precision requires proper setup but is achievable with quality brackets.
Seasonal Adjustments
Wood tables expand and contract with humidity changes. Check calibration quarterly in climates with significant seasonal variation. A setup that's perfect in January may show minor error by July as humidity changes wood dimensions.
Aluminum-framed tables avoid this issue but require different mounting considerations. The T-track channels in aluminum extrusions can wear over time, requiring tighter mounting or occasional replacement.
Maintaining Bracket Performance
The pivot mechanism needs occasional lubrication. A drop of light machine oil on the pivot points every 6 months keeps movement smooth. Avoid grease or heavy oils that attract sawdust, creating gummy buildup that interferes with pivot action.
Check SpiRail Dogs periodically for wear. The integrated design of the Dash-Board system means dogs wear at the contact points over thousands of cycles. Visual inspection shows whether the dogs still sit tight in the rail channel or have developed play.
Maximizing Your Bracket System's Capabilities
Once installed, guide rail brackets enable cutting techniques impossible with freehand rail placement.
Repeatable Stop Settings
Adding stops to your fence allows identical cuts without measuring. The bracket ensures each cut maintains the same angle while the stop controls length. Professional cabinetmakers often have multiple stops set for standard door or drawer dimensions.
This workflow eliminates tape measure errors entirely. You're working from physical references rather than measurements, which is both faster and more accurate.
Angled Cuts With Consistency
Most bracket systems, including the Dash-Board design, pivot through a range of angles. Setting a 45-degree miter becomes as simple as squaring to your fence at 45 degrees rather than 90. The bracket locks this angle, allowing repetitive miter cuts without remeasuring.
Verify angle accuracy the same way you verified square: test cuts on scrap material. A good triangle or digital angle gauge confirms your angle setting.
Full-Sheet Processing
With brackets positioned 48 inches from your fence, you can crosscut a full 4x8 sheet in half without repositioning. This requires two brackets spaced along your rail's length (typically 55 inches minimum rail length).
The brackets maintain perpendicular alignment across the full width, preventing the angular drift that occurs when trying to square a long rail freehand.
Troubleshooting: When Cuts Aren't Square
Problem: Inconsistent Results Between Left and Right Edges
This indicates bracket misalignment or table twist. Re-verify square on both brackets using your reference edge. Check table flatness across the mounting span. If one bracket sits even 1/16 inch higher than the other, angular error results.
Problem: Rail Binds When Pivoting
Binding occurs when SpiRail Dogs aren't fully seated in the rail channel or when mounting height varies between brackets. Remove the rail, verify dog installation, and remount. Check that both brackets sit at identical heights above the table surface.
Problem: Cuts Are Accurate Initially But Drift Over Time
This suggests bracket mounting looseness. Check that knobs remain tight after several hours of use. Wood compression can allow slight movement as mounting holes deform under repeated stress. Adding thin washers under bracket mounts often solves this.
Problem: Saw Tilts During Cut
If your saw tips or feels unstable, rail height needs adjustment. The rail should sit slightly above material surface but low enough that the saw's anti-tip guides engage. Different saws have different requirements, so test with your specific model.
Comparing Bracket Systems: What Justifies the Price Difference
Budget bracket systems start around $80-120 for import versions. Mid-tier options like upgraded MFT brackets run $200-250. Premium systems like the Dash-Board Guide Rail Bracket Set cost $359. Understanding what you get for this range matters.
Build quality and material: Budget brackets use stamped steel or thin aluminum with plastic components. Premium brackets use machined aluminum with all-metal construction. This affects rigidity under cutting forces and longevity under daily professional use.
Adjustment range: Inexpensive brackets often lack micro-adjustment capability. Once mounted, repositioning requires complete removal and reinstallation. Quality systems allow fine-tuning without remounting.
Universal compatibility: Budget brackets typically work with one rail brand. Universal designs like the Dash-Board system accept any major rail brand through adjustable mounting.
Actual perpendicularity: The claimed accuracy and achieved accuracy often differ. Premium brackets machine the critical surfaces to tight tolerances. Budget options rely on assembly accuracy, which varies between units.
Customer experiences validate these differences. Evan's review after trying multiple brackets: "I've used others. None are as sturdy and true as this guide rail bracket." William Gilbertson notes the attention to detail: "Quality product and very well packaged for shipment."
When to Use Brackets vs. Alternative Methods
Guide rail brackets serve specific workflows. Understanding when they're ideal and when simpler methods work better prevents unnecessary investment.
Brackets Excel At:
- Repetitive crosscuts at the same length
- Production work requiring identical angles
- Full-sheet breakdown where perpendicular accuracy matters
- Professional environments where setup time = money
- Situations requiring frequently verified square reference
Alternative Methods Work Better For:
- One-off cuts at varying lengths
- Site work without stable table setup
- Curved or non-standard cuts
- Extremely long cuts beyond bracket capacity
- Situations where table mounting isn't available
The crossover point typically hits around 5-6 identical cuts. Fewer than this and measuring each cut individually takes roughly the same time as bracket setup. More than this and brackets show clear efficiency advantages.
Maintenance Schedule for Long-Term Performance
Weekly (for daily professional use):
- Wipe sawdust from bracket mechanisms
- Verify knobs remain tight
- Check rail contact points for buildup
Monthly:
- Test cut verification
- Clean SpiRail Dogs and rail channels
- Check for wear on pivot points
Quarterly:
- Full recalibration using combination square
- Lubricate pivot mechanisms
- Verify table flatness hasn't changed
- Inspect mounting holes for wear
Annually:
- Replace worn SpiRail Dogs if needed
- Check knob threads for damage
- Verify rail straightness with straightedge
- Document performance for warranty purposes
The Real Value: Time and Material Savings
A $359 bracket set seems expensive until you calculate actual costs. Professional cabinetmaker Douglas Pelchat quantifies the impact: "Speeds production, reduces waste and makes the whole process flow smoothly."
Time savings: Eliminating 3 minutes of setup per crosscut means 30 minutes saved per 10 cuts. At professional rates of $75-150 per hour, 10 cuts justify the bracket cost. Monthly savings compound significantly for production shops.
Material waste reduction: A single ruined sheet of quality plywood costs $80-100. If brackets prevent one wasted sheet through improved accuracy, they've paid for themselves. Most users report reduced waste from the first day of use.
Confidence factor: Working with verified square reference eliminates the mental overhead of questioning each cut. This psychological benefit improves overall workflow efficiency beyond pure time measurements.
Making Your Decision
Guide rail brackets suit users who make frequent crosscuts requiring consistent accuracy. The installation process demands attention to detail but isn't technically complex. Proper setup delivers the accuracy that professional work demands.
The Dash-Board Guide Rail Bracket Set at $359 represents premium construction with universal compatibility. It accepts any major rail brand, mounts tool-free, and maintains accuracy under production use. The 54 five-star reviews (5.0 average) indicate consistent performance across different users and applications.
Budget alternatives exist but often sacrifice the precision and durability that make brackets worthwhile. As Dennis May discovered after upgrading: "I had the Festool bracket and this far exceeds the quality. I highly recommend this."
For professional users billing $75+ per hour, brackets pay for themselves within weeks through time savings and waste reduction. For serious hobbyists making multiple projects monthly, the investment improves both efficiency and result quality. For occasional users making fewer than 10 crosscuts monthly, freehand rail placement may serve adequately.
The key question isn't whether brackets work properly installed, they demonstrably do. The question is whether your work volume and accuracy requirements justify the investment. For most users making more than weekly crosscuts, the answer is yes.
Ready to upgrade your cutting accuracy? The Dash-Board Guide Rail Bracket Set includes everything needed for installation: brackets, SpiRail Dogs, mounting hardware, and detailed setup instructions.