Your Cart
Product Title
$0
$0
-
+
Your cart is empty.
Add Discount Code?
Add Cart Note?


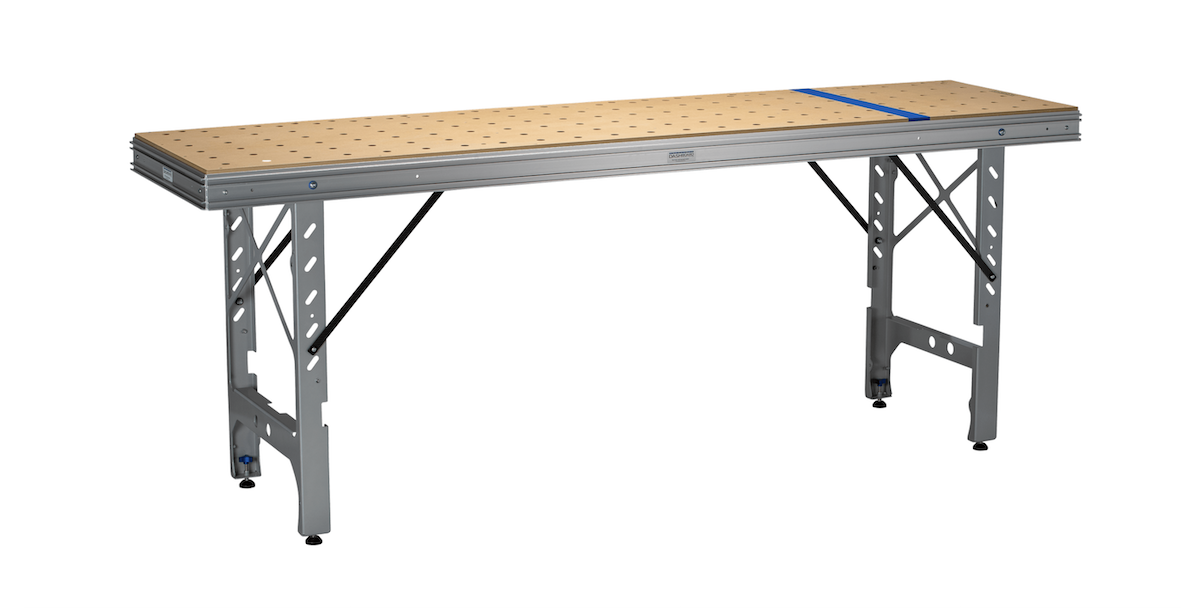
You bought the table. You watched the videos, drilled or unboxed the grid, set up your rail, and made a few cuts that came out beautifully. Then somewhere around the third project you noticed you were checking square before every important cut, and the checking was taking longer than the cutting.
That experience is common enough that it drives a whole aftermarket. The MFT concept is sound, and nothing here suggests otherwise. But the original execution has a short list of specific weak points, and every one of them is fixable without buying a different bench. This article walks through five upgrades that address the problems MFT owners actually report, in the order most people benefit from tackling them.
Worth knowing where this perspective comes from: Rob Schumacher bought the best-known multi-function table on the market for a renovation job in a 1925 Denver mansion where nothing could be prebuilt in the shop. He spent about a year and a half trying to make that table work before concluding the fixes did not exist and he would have to build them. The accessories below came out of that stretch.
The weak points on a stock MFT table cluster into four areas: a rail hinge system that develops play and drifts off 90 degrees, a fence that flexes and limits crosscut width, a work surface too small for panel-sized material, and a ripping workflow that depends on rail-mounted guides requiring independent calibration. None of these are flaws in the 20mm grid concept, which is why upgrading the hardware around the grid works so well. The table stays. The parts that frustrate you get replaced.
This is the fix that changes the most for the most people.
A guide rail bracket is a hinge, and a hinge is a bearing surface under repeated load. Set the rail down a few hundred times, lift the saw off at the end of a cut a few hundred times, and small amounts of play develop where the pivot meets its mount. Play means the rail no longer returns to exactly the same position, and once that is true you have no choice but to verify before any cut you care about.
The verification habit is not paranoia. It is a rational response to hardware that moves. But it is also several minutes lost every single time, and on a batch day that adds up to real hours.
The Guide Rail Bracket Set mounts to the side tracks of an MFT3 or 1080 using T-bar or T-bolt hardware, both of which ship in the box. It pivots your rail from a fixed 90 degree position, and the design intent is that once it is set, it stays set. Cabinet makers who have written verified reviews describe dropping the re-squaring step entirely after switching.
A few specifics worth knowing before you order:
One bonus that catches people by surprise: the set ships with two Universal Setup Blocks, four Medium Bench Dogs, and a SpiRail Dog. That means upgrade two is largely already in the box.
Even with a bracket that holds square, there is a second repeatability problem hiding in most MFT workflows: where exactly does the rail sit front to back?
If the answer involves a pencil mark, a piece of tape, or a habit of lining up to the same hole and hoping, you are introducing variation on every setup. You also spread blade contact across your MDF top, which is how a nice flat surface turns into a field of kerfs.
On the dogs themselves, one detail matters more on an MFT than on most benches. Dash-Board Bench Dogs are machined from Delrin rather than metal. An MDF MFT top dents easily, and a dropped aluminum or steel dog leaves a mark you cannot sand out without changing the surface plane. Delrin absorbs the impact instead. They come in three heights (1 inch, half inch, and 3/16 inch), and the half-inch Medium is the one that ships with the bracket set and covers most work.
Here is the compatibility fact to get straight before you spend anything: Dash-Board accessories do not work with the Festool MFT3 fence. This upgrade replaces that fence. It does not bolt onto it.
What you get in exchange is a reference edge that does not flex. The F2 Surface Mount Fence is a single anodized aluminum extrusion running 54.75 inches (1390mm), which is considerably longer than the table it is mounting to. It anchors using three sliding Fence Blocks that drop into whatever 20mm holes suit the setup, then lock down with all-metal knobs. No tools, no loose fasteners to lose in the shop vacuum.
Three things the F2 does that a stock fence generally will not:
Add a Reversible Flip Stop and repeat cuts don’t need a tape measure. The stop flips up for loading and down for registration, and it reverses for additional placement options. Note that Gen 2 and Gen 1 fences and flip stops cannot be mixed, so match generations when ordering.
If you need support on the right of the blade for longer parts, the F1 Surface Mount Fence handles that, and both fences ship together in the Fence Bundle.
A Festool MFT3 gives you about 43 by 28 inches of surface. That is a fine size for its intended job and an awkward one the moment you are handling cabinet parts, door blanks, or anything cut from a full sheet.
Track Stars attach to the side tracks using the same T-bar or T-bolt hardware as the brackets, and each one projects an 8 inch long by 5.75 inch deep aluminum platform out past the table edge. That platform carries its own 20mm holes and slots. A Track Star is not just material support. It is additional grid real estate positioned outside the table footprint, and it will take fences, parallel guides, SpiRail Dogs, and standard 20mm workholding.
Height matching is handled by three sets of mounting holes plus 1.437 inches (37mm) of fine vertical adjustment within each position, which covers the MFT3, the 1080, the Kreg ACS, the Benchdogs Ultra MFT, and most shop-built tables. You want the Track Star surface flush with your bench top, and that adjustment range is what gets you there.
Practically, this is what lets you mount your fence outboard for wider crosscuts, support offcuts so they do not drop and chip, and get clamping access outside the table perimeter for scribing and edge work.
Most MFT owners crosscut on the table and rip somewhere else, usually because rail-mounted parallel guides are fussy enough that the table saw wins by default.
The root issue is the reference point. When parallel guides clamp to the guide rail, your rip width depends on the rail's position and the clamps holding the guides. Both of those move. Dash-Board Parallel Guides anchor into the bench top's 20mm holes or into Track Stars using four included ExpanDogs, so the reference is the table rather than the rail. Tables do not move.
Each guide carries two working heights: a 6mm end that slips beneath the rail for cuts narrower than the rail itself, and a 29mm capped end that raises the reference for stacked or slightly cupped material. The set handles pieces under an inch wide and material as thin as a quarter inch without extra attachments.
Pair them with The Rip Gauge and the calibration step disappears. The gauge sets stops up to 25.5 inches (648mm) from either side of the blade and includes three swappable kerf tabs (1.8mm, 2.2mm, and 2.4mm) that cover the common track saw blade widths. You dial in the finished dimension you want, not the distance to the blade, because the tab has already accounted for what the kerf removes. Both guides get set from that single standard instead of being calibrated independently against each other.
If you want the full ripping sequence rather than the component overview, our post on making repeatable rip cuts in a small workshop covers it step by step.
If you are working through this over several months rather than all at once, this sequence builds on itself cleanly.
If you already know you want most of this, the Core MFT Bundle packages the bracket set with its setup blocks, dogs, and SpiRail Dog, plus two Track Stars, an F2 Fence, a Reversible Flip Stop, and an extra pair of SpiRail Dogs. It was assembled specifically for people upgrading a bench they already own.
All five upgrades work on benches with a 20mm hole grid and standard side tracks. Confirmed compatible tables include the Festool MFT3, the older Festool 1080, the Benchdogs Ultra MFT, TrackTubes, T-slot extrusion tables with 8mm slots, wood-frame tables with standard T-track, and DIY MFT-style benches built to spec.
A few table-specific notes:
Full track specifications live on the FAQ page.
Honest answer: it depends on whether your complaint is about the hardware or about the table.
If your frustrations are the ones listed above, upgrading is the better economics by a wide margin. You keep a table you already paid for and you fix the specific parts causing trouble.
If your actual complaint is that the surface is too small for the work you do, or that the whole assembly moves under lateral pressure regardless of what you bolt to it, then you are describing a bench problem rather than an accessory problem. That is the point where looking at a larger, more rigid platform makes sense, and every accessory here carries over to one. If you are still weighing the format itself, our post on what an MFT table is and whether you need one covers that ground.
There is no correct entry point here, only the honest one. Whichever of these five problems you have been working around the longest is the one to solve first, because you already know exactly how much time it costs you.
For most people that is the rail bracket, since re-squaring is a tax you pay on every single cut. For someone doing batch work it might be the fence and flip stop. For anyone breaking down sheets in a garage, it is probably the ripping setup. All of them are separable purchases, all of them mount without drilling or permanent modification, and accessories carry a 30-day return window if something does not suit your table.
Browse the full accessory line on the shop page, or watch the calibration and setup sequences in the video library before you commit to anything. If you are unsure which parts fit your particular table, send a photo of the side profile through the contact page or call (303) 376-5703. Rob handles those questions himself and can tell you from the track profile whether the T-bars will seat.
You can upgrade a Festool MFT3 rather than replacing it, and for most owners that is the more sensible path. Replacement guide rail brackets, a surface-mount fence, side-mounted Track Stars, and table-anchored parallel guides all install on the MFT3 without drilling or permanent modification. These address the square drift, fence flex, and limited capacity that MFT3 owners most commonly cite.
The guide rail bracket set is the most worthwhile first upgrade for most MFT owners, because bracket play is what forces the re-squaring habit that costs time on every cut. A replacement set holds its 90 degree setting between cuts and typically ships with setup blocks and bench dogs, which covers the rail placement upgrade at the same time.
Dash-Board accessories are not compatible with the Festool MFT3 fence. The F2 and F1 Surface Mount Fences are replacements rather than add-ons, and they mount independently into the 20mm hole grid using sliding Fence Blocks. Reversible Flip Stops are designed for Gen 2 Dash-Board fences only, and Gen 1 and Gen 2 fences and stops cannot be mixed.
MFT upgrades fit shop-built tables that have a true 20mm hole grid and properly specified side track. T-bolts require at least a 7mm slot opening and 12mm interior width, while T-bars need over 12mm interior width and clearance for 6mm thickness. Center the track 29mm or 39mm below the work surface on a three-quarter inch top, with vertical backing to prevent the base plates tilting.
An MFT table holds square between cuts when the rail bracket has no play and the rail returns to a fixed position. Replace the stock hinge with a bracket set that locks its 90 degree setting, then add setup blocks anchored in the 20mm grid so the rail lands against a physical stop rather than a pencil mark. Verify the initial setup with the five-cut method.
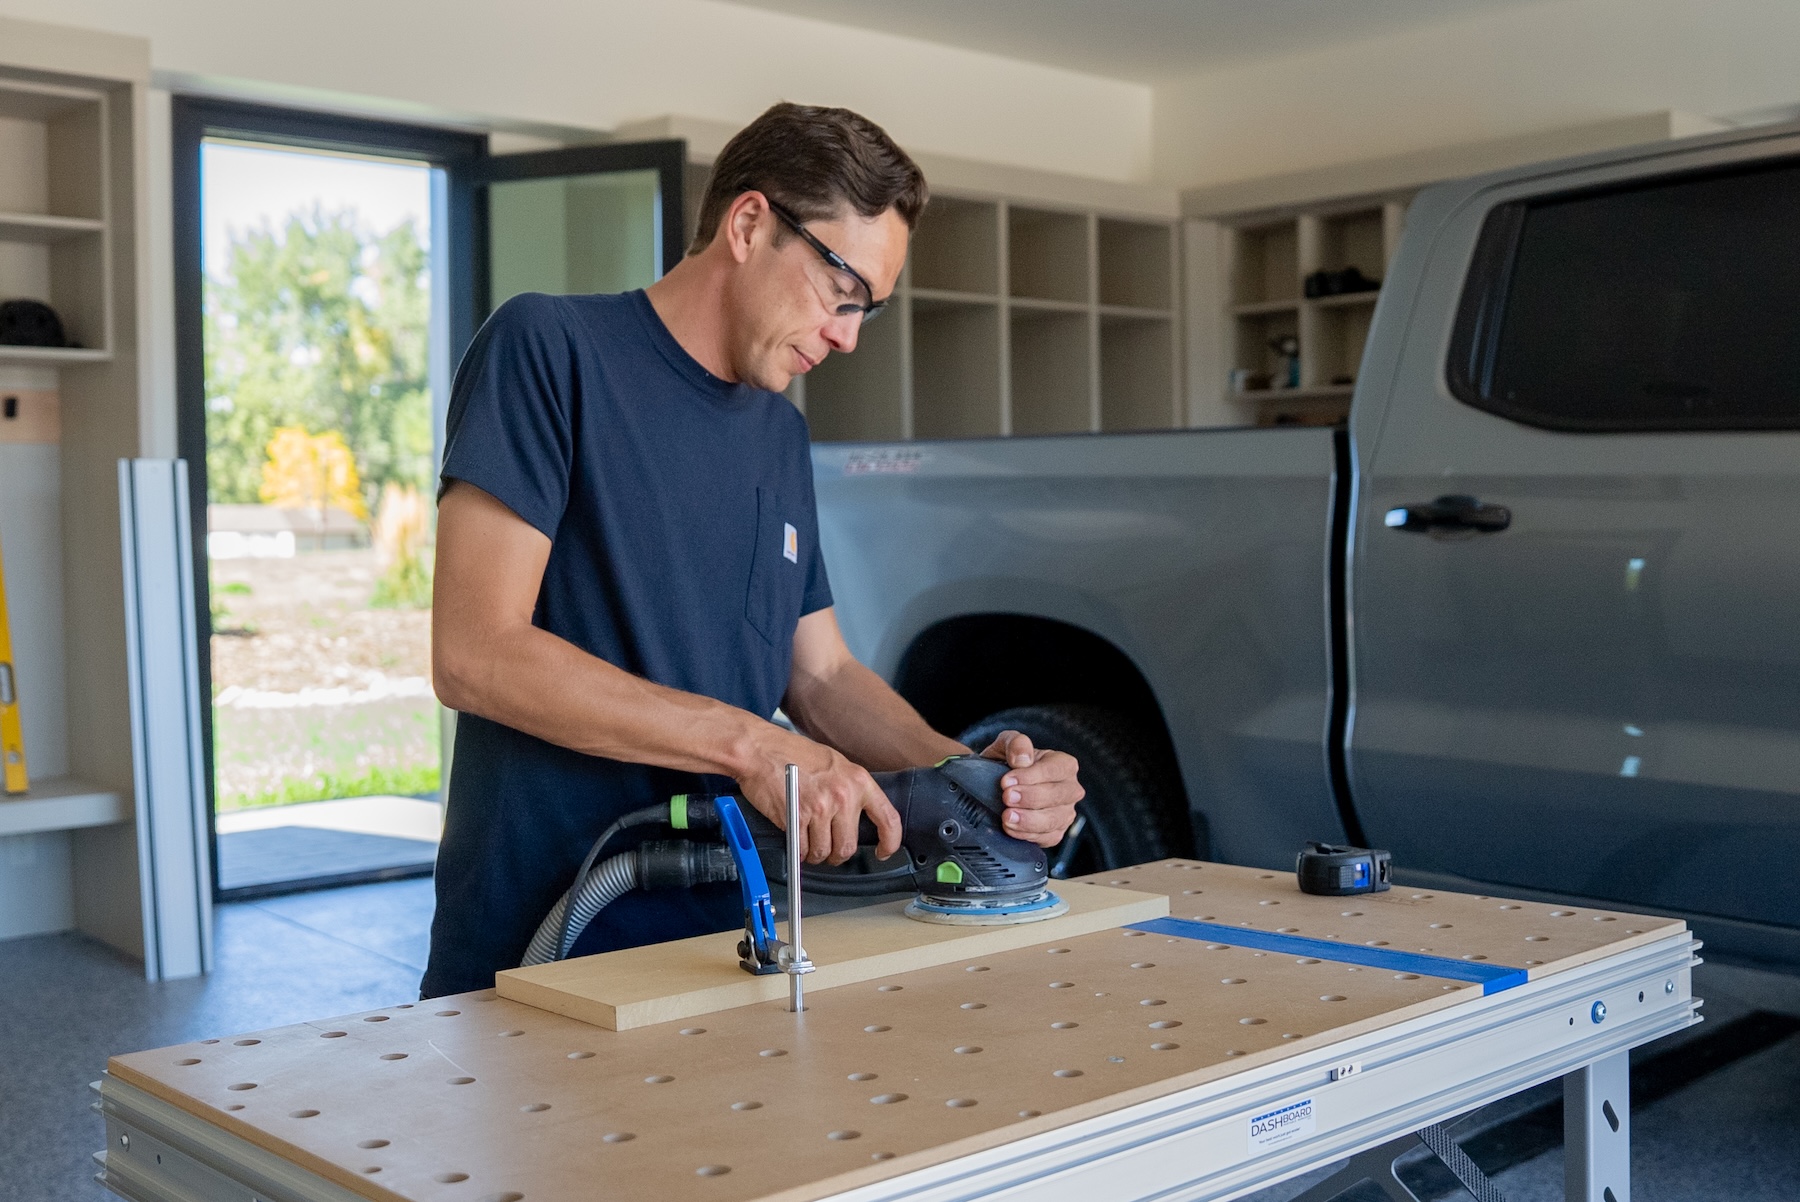
See what FORG3D noticed when Texas Woodworking Festival attendees pushed on the Dash-Board Portable Workshop, and why stability matters in everyday work.
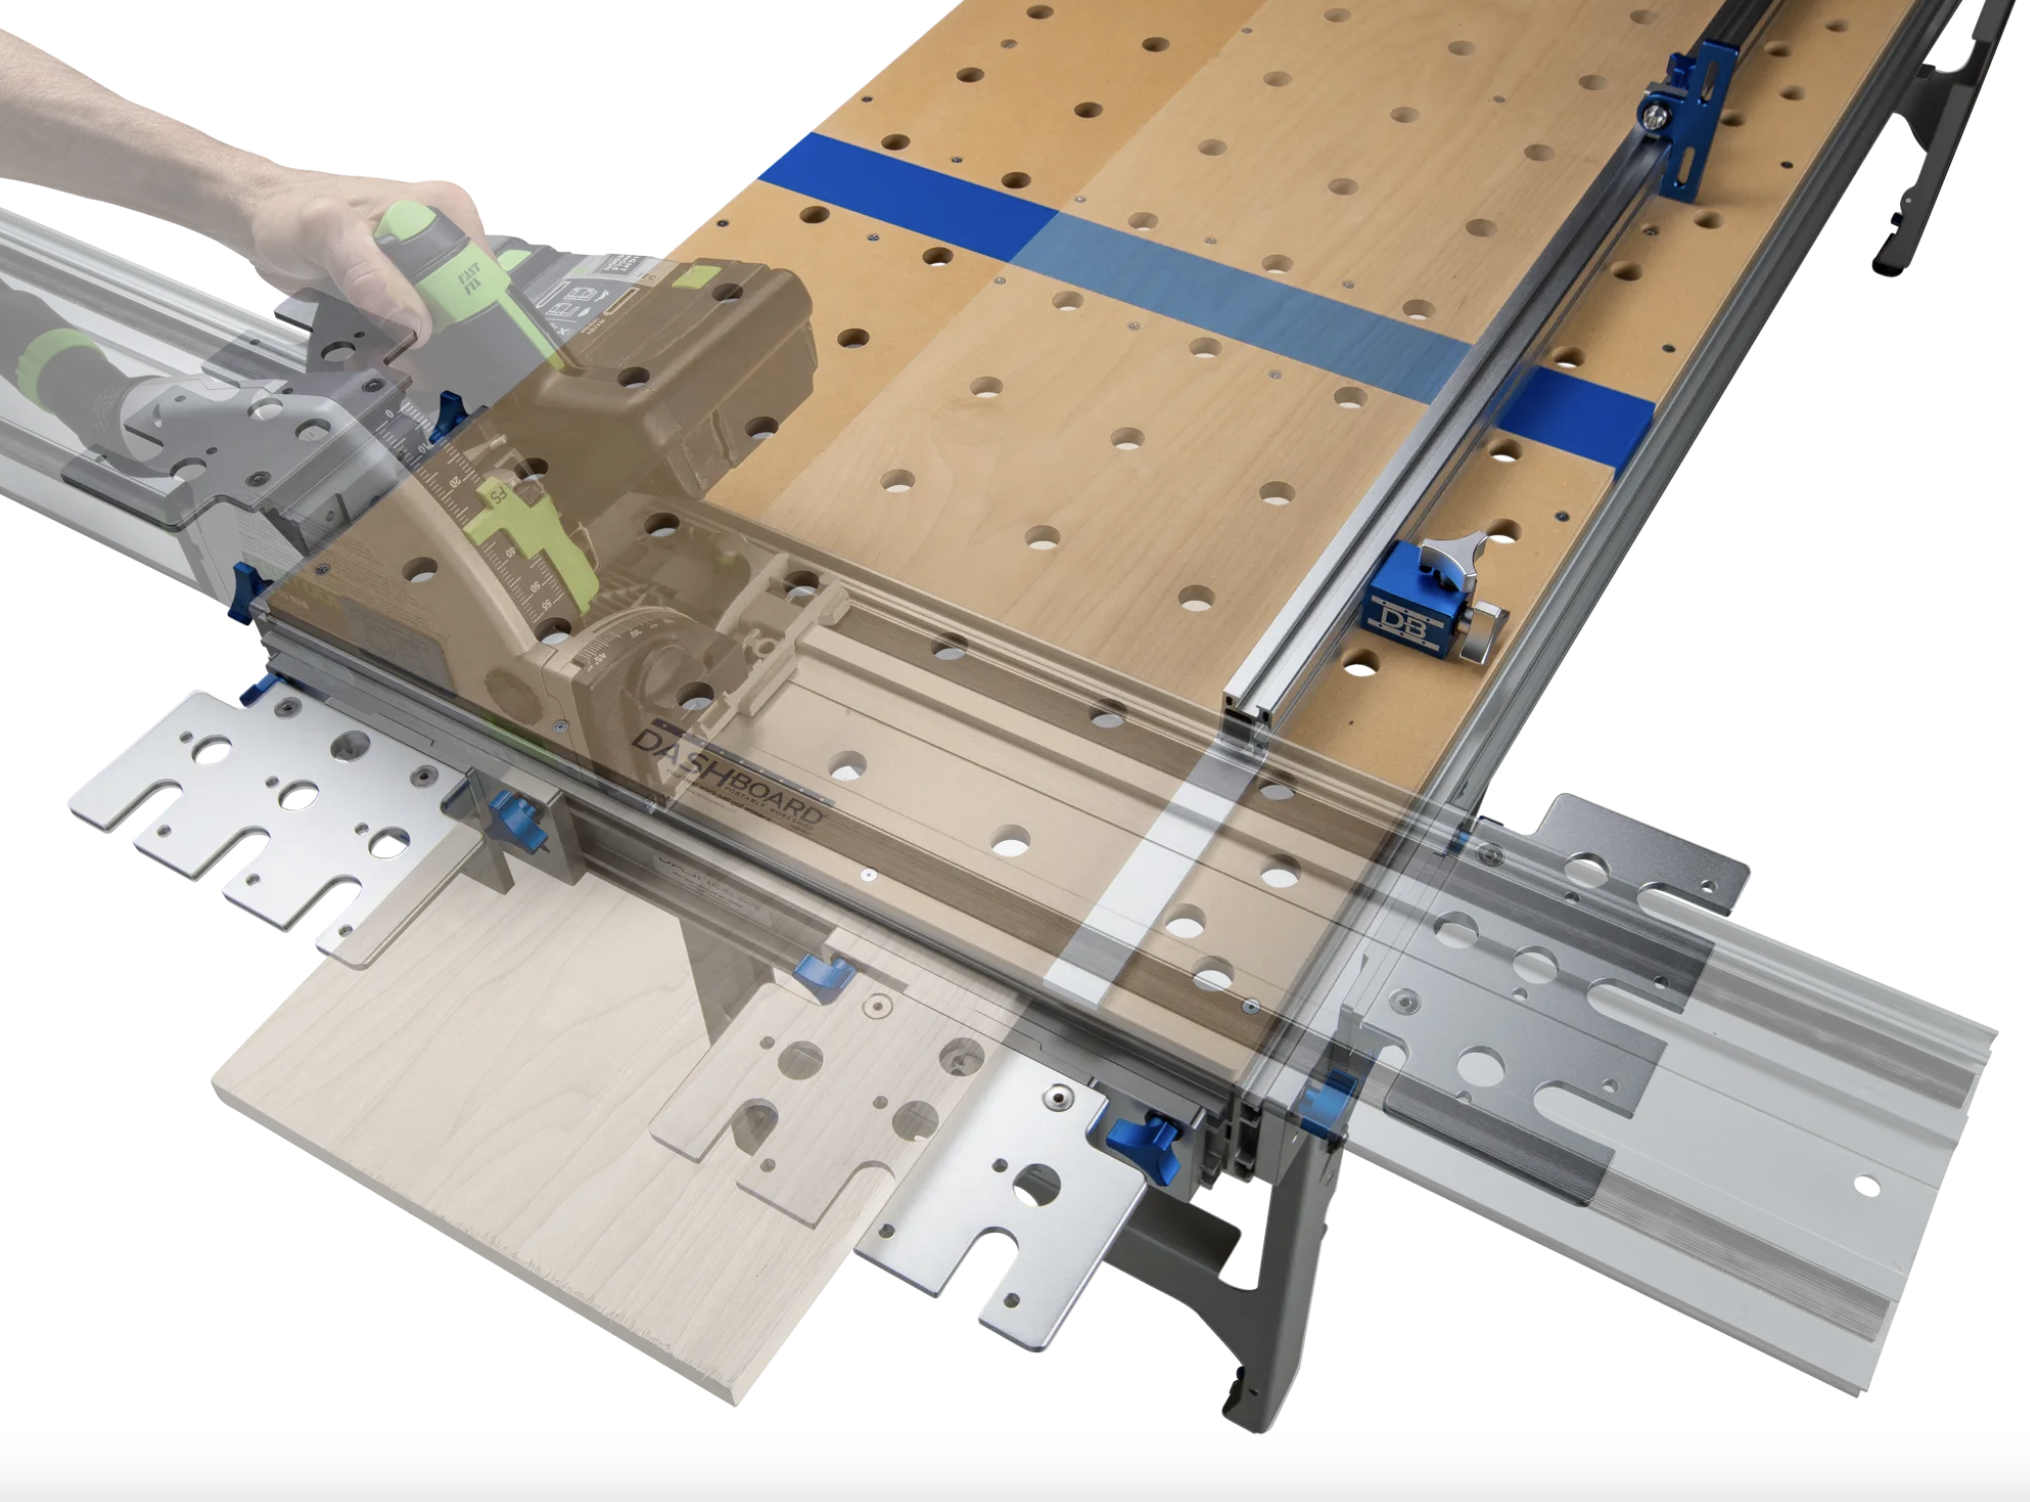
A miter comes from angling the rail or workpiece, while a bevel comes from tilting the saw. Verify your angles in scrap, lock the setup so nothing moves, and every part in the run comes out the same.
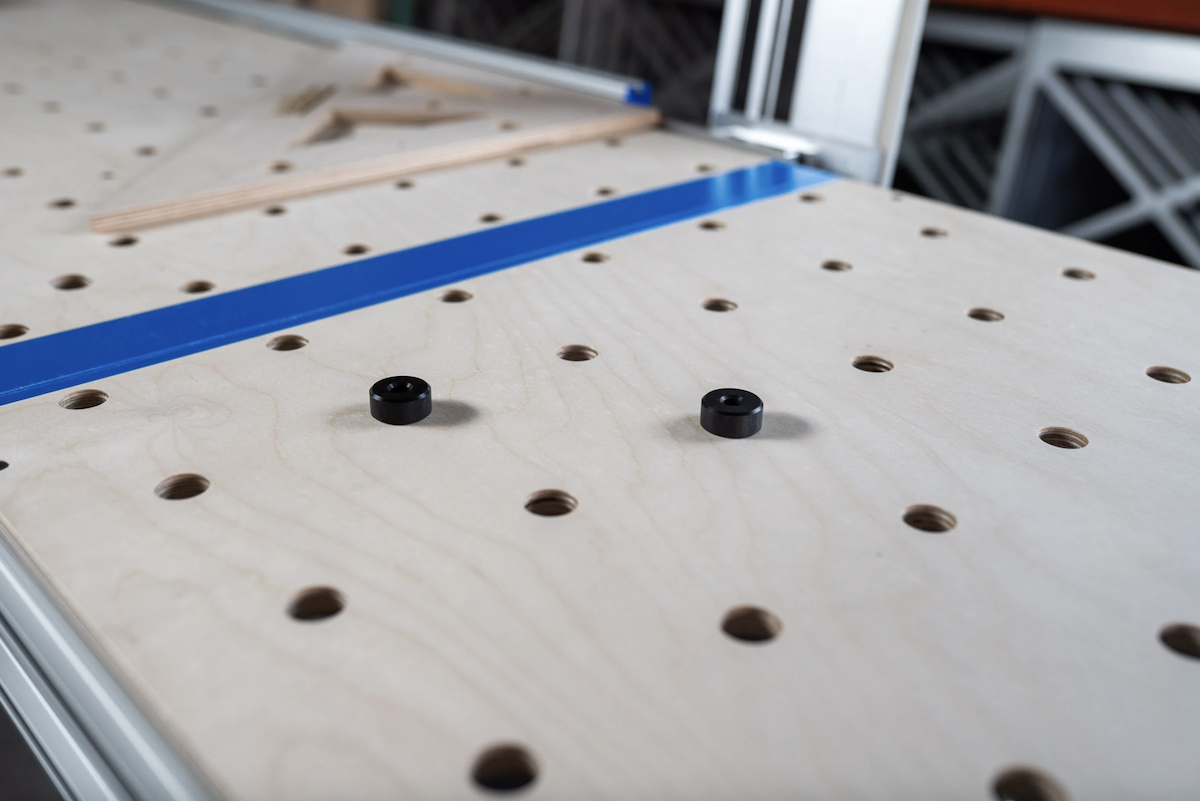
The 96mm grid of 20mm dog holes is the MFT standard Festool set, so any true 20mm/96mm bench shares the same accessories. Since the spacing is fixed, counting holes is more reliable than measuring.
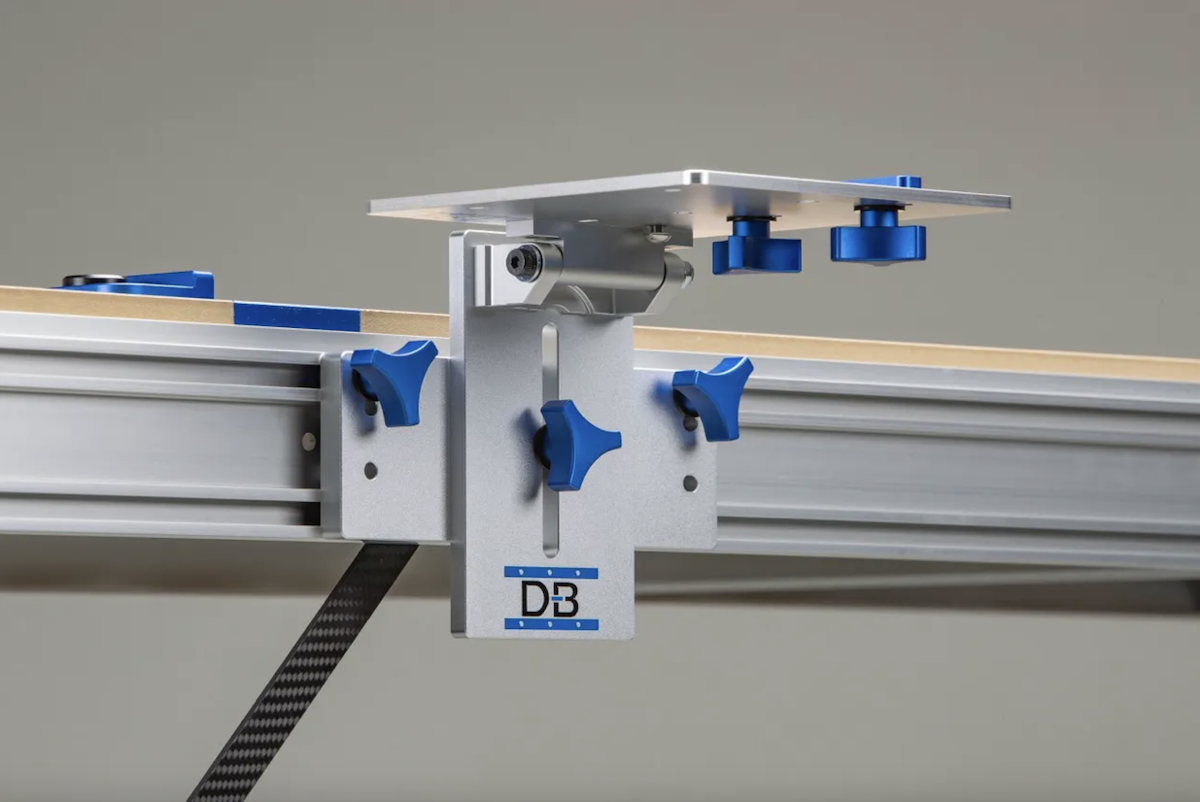
Guide rail brackets hinge your track saw rail to a fixed, repeatable 90-degree position on the bench, so you calibrate square once instead of re-checking it before every cut. Rigid, machined construction with no play is what lets the rail hold that reference through height changes and daily use, turning setup into a one-time task rather than a recurring chore.
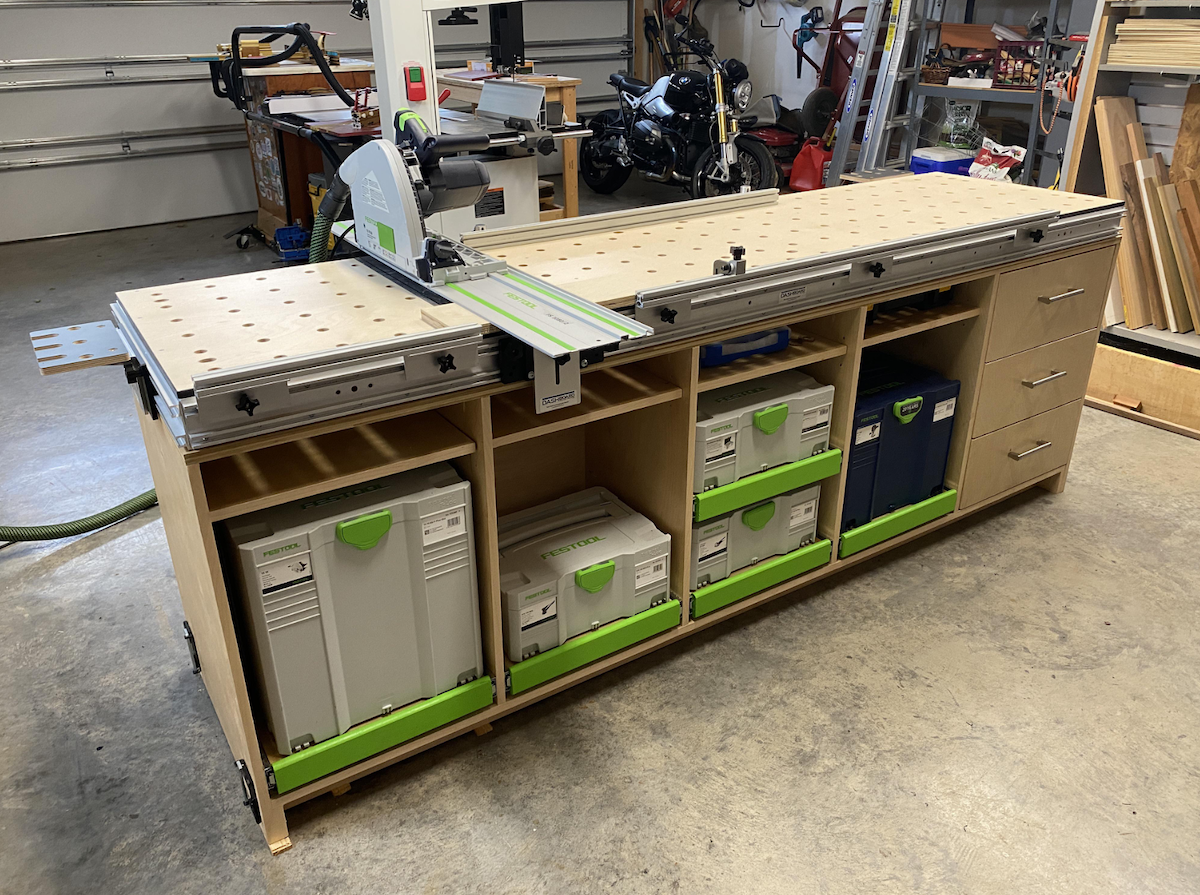
An MFT is a Multi-Function Table built around a perforated 20mm hole grid and guided cutting, letting you crosscut, clamp, sand, rout, and assemble all on one portable surface. It's a strong fit if you do precision crosscuts and sheet goods work, though drift and rigidity issues in some designs are why many owners upgrade to sturdier aftermarket benches and brackets.
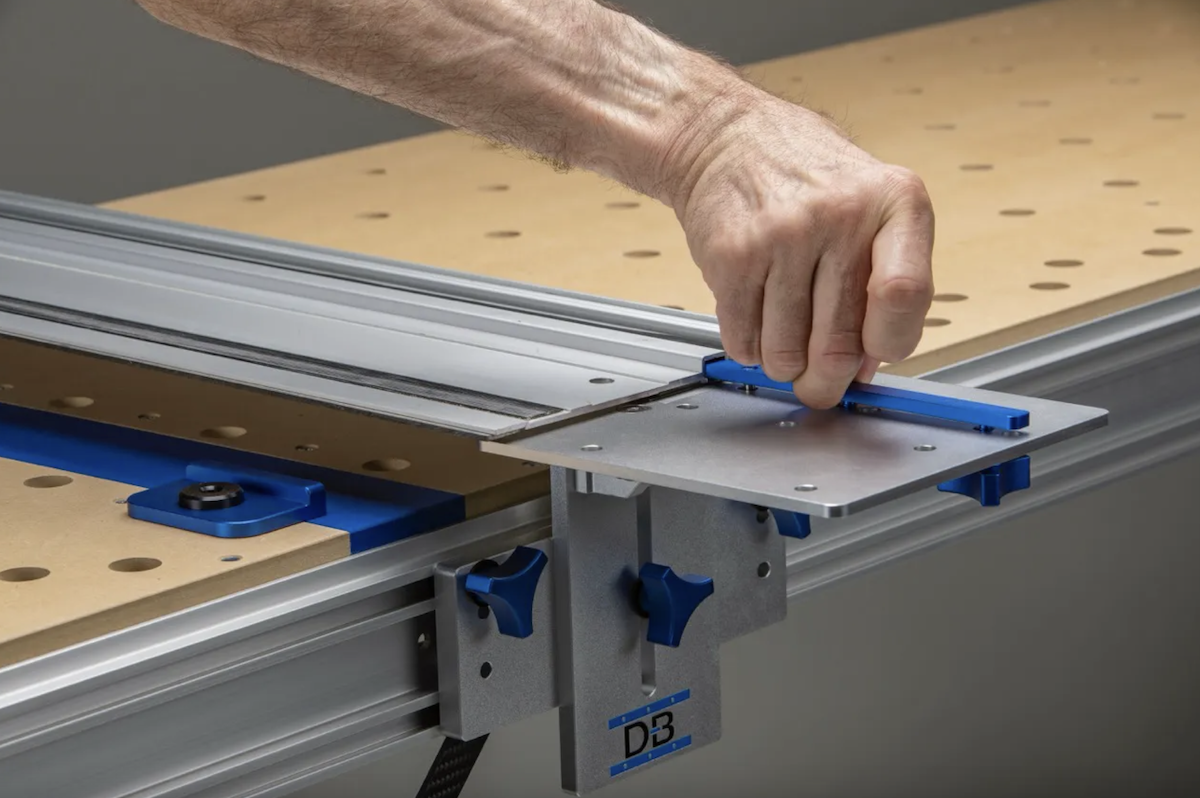
Track saw rail slip almost always comes down to dirty or worn grip strips, dusty or slick surfaces, or not enough downward pressure, and cleaning the strips plus clearing the workpiece solves most cases instantly. For repeatable, no-slip accuracy, clamps work but a fixed bench bracket system locks the rail in place for good.
